 Emi Sato
I still remember my first attempt at making sushi rice. The grains turned out mushy on the outside yet crunchy inside. My Japanese friend took one bite and said, “You didn’t soak it, did you?” That one sentence sent me down a decade-long path of refining how to cook Japanese rice — and I’m about to hand you the shortcuts I wish I’d known from day one.
What's in this guide
Pick the Right Rice (Not All Short-Grain Is Created Equal)
Walk into any Asian grocery and you’ll see bags labeled “sushi rice,” “calrose,” and “koshihikari.” They behave differently. For authentic Japanese rice recipe results, stick to short-grain japonica varieties. Koshihikari from Niigata prefecture has a sweet, glossy finish. Calrose (grown in California) is more forgiving and cheaper — I use it for weeknight meals. Avoid long-grain jasmine or basmati; they won’t give you that sticky cling.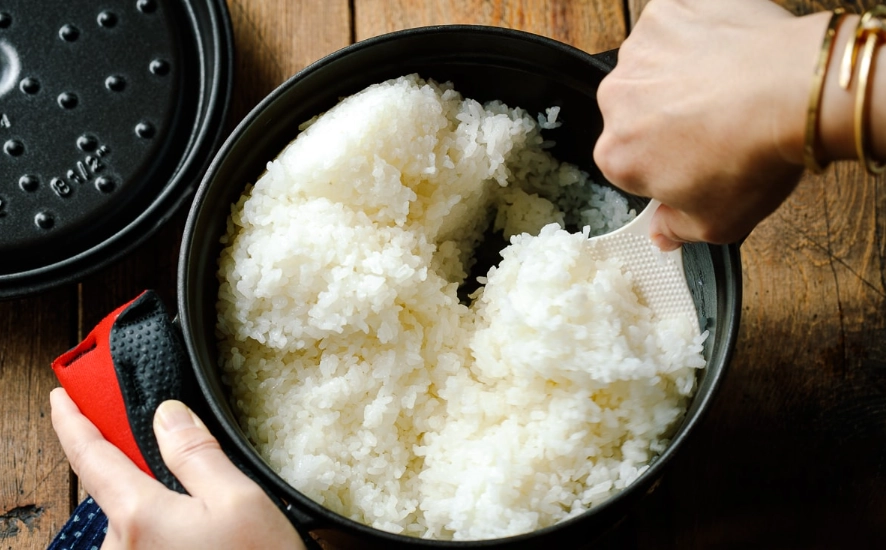
Where to buy: Japanese specialty stores like Nijiya Market (locations in California, New York, Hawaii) sell 2kg bags of Koshihikari for around $12–$18. Check the milling date — the fresher, the better.
Washing & Soaking Secrets (Most People Skip This)
Rinse the rice in a bowl of cold water, swirl gently with your fingers, and pour off the cloudy water. Repeat 3–4 times until the water runs nearly clear. This removes excess starch that makes rice gluey. Then soak. How long? 30 minutes in summer, 1 hour in winter. I once skipped soaking while rushing to a dinner party — the result was a gritty texture that ruined the meal.
Use a fine-mesh strainer to drain the rice for at least 10 minutes before cooking. Excess surface water throws off the water-to-rice ratio.
The Water Ratio That Works (Stop Guessing)
Standard ratio: 1 cup Japanese short-grain rice to 1.1–1.2 cups water. That’s roughly 10% more water than rice by volume. For new crop rice, use 1.05 cups. For older rice (more than 6 months old), bump to 1.25 cups. I keep a small measuring cup dedicated to rice — eyeballing never works.
| Rice Type | Water (per 1 cup rice) | Best For |
|---|---|---|
| Koshihikari (new crop) | 1.05 cups | Sushi, onigiri |
| Calrose | 1.15 cups | Everyday bowls |
| Brown Japanese rice | 1.5 cups | Health-focused meals |
| Sweet rice (mochigome) | 0.9 cups | Mochi, sekihan |
Always use filtered water if your tap water has a strong chlorine taste. I learned that the hard way in a city with hard water — the rice picked up a metallic edge.
Stovetop, Rice Cooker, or Microwave? (Honest Comparison)
Stovetop (My go-to for small batches)
Combine rinsed, soaked rice and water in a heavy-bottomed pot (a donabe is ideal but a Dutch oven works). Bring to a boil over medium-high heat, cover, and let boil for 1 minute. Reduce heat to low and cook for 10–12 minutes. Turn off heat and let sit, covered, for 10 minutes. Do not lift the lid during cooking — steam is the secret.
Rice Cooker (Foolproof for larger batches)
Use the measuring cup that came with the cooker. Rinse and soak as above, then hit “start.” A good rice cooker (Zojirushi, Tiger) will keep rice warm for 12 hours without drying out. I’ve had my Zojirushi for 8 years — still perfect.
Microwave (Emergency only)
Use a microwave-safe bowl with a lid. Cook 1 cup rice + 1.2 cups water on high for 6 minutes, then medium (50% power) for 10 minutes. Rest 10 minutes. Texture is slightly less fluffy, but it beats takeout.
Rest and Fluff for Fluffy Grains (The Step Everyone Rushes)
After cooking, let the rice rest, covered, for 10–15 minutes. This allows the moisture to redistribute. Then fluff gently with a rice paddle (shamoji) — cut through the rice in a slicing motion, not stirring. Overmixing turns rice into paste.
Fix Common Rice Disasters (From My Own Mistakes)
- Rice too hard? Add 2 tablespoons of hot water, cover, and microwave for 1 minute on medium. Let rest 5 minutes.
- Rice too mushy? Spread it on a plate and fan it for 2 minutes — evaporation firms it up. Use it for congee the next day.
- Burnt bottom? Don’t scrape. Transfer the top rice to a serving bowl; the burnt layer (okoge) is actually a treat — eat it with a splash of soy sauce.
One more thing: never store rice in the fridge while still hot. It gets gummy. Cool it to room temperature first, then refrigerate in an airtight container for up to 2 days.
FAQ: Real Questions from Home Cooks
This guide was fact-checked against cooking guidelines from the Japan Rice Retailers Association and my own repeated kitchen tests.
Reader Comments