 Emi Sato
What You'll Find in This Guide
My first attempt at a tamagoyaki recipe ended up looking like scrambled eggs wrapped in a napkin. It tasted fine—but the layers were torn, the shape was lopsided, and the texture was rubbery. I blamed the pan. Then I blamed the eggs. Eventually I realized the problem was my technique.
After years of trial and error (and a few patient lessons from a friend's grandmother in Osaka), I landed on a method that works every single time. No special tamagoyaki pan required. No paper towels. No praying to the egg gods.
This is the version I wish I had when I started.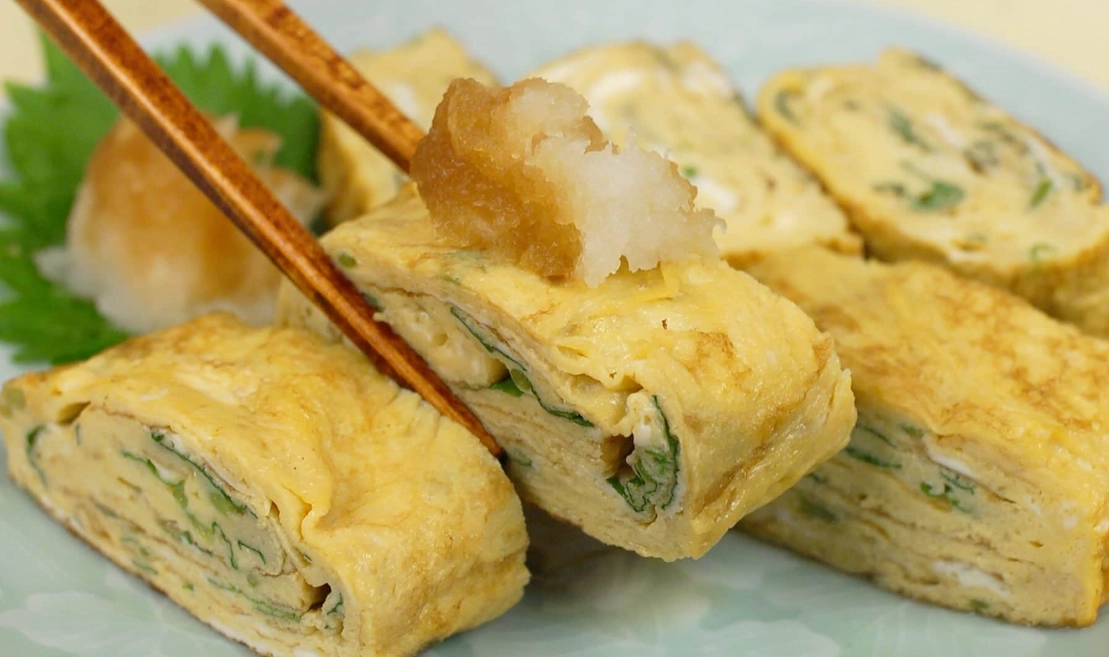
Why Most Tamagoyaki Recipes Fail
Here's the non-consensus take: the biggest culprit isn't your rolling skill. It's the heat.
Most recipes say "medium heat" and leave it at that. But egg proteins denature fast. On a standard gas stove, medium is often too hot—the bottom sets before you can spread the egg evenly, and the next layer cooks unevenly because the pan temperature fluctuates.
What I do instead: I preheat the pan over medium-low for a full two minutes, then lift it off the heat for five seconds before adding each layer of egg. This small pause drops the surface temperature just enough to keep the egg from bubbling.
Another overlooked factor: egg temperature. Cold eggs straight from the fridge take longer to cook and can create steam pockets. Leave them on the counter for 15 minutes before whisking.
And one more thing—stop stirring the eggs in the pan. Your first layer should set without you touching it. If you're pushing the egg around like you're making an omelet, you're already off track.
Exact Ingredients and Tools
This recipe makes a standard 3-egg tamagoyaki that serves two as a side. Double the ingredients if you want a thicker roll.
| Ingredient / Tool | Amount / Spec | Why It Matters |
|---|---|---|
| Eggs (large, room temp) | 3 | Cold eggs cook unevenly; room temp gives a silkier texture |
| Dashi stock (or water) | 2 tbsp | Dashi adds umami; water is fine if you're keeping it simple |
| Mirin | 1 tsp | A touch of sweetness; optional but recommended |
| Light soy sauce | 1/2 tsp | Adds depth without turning the egg brown |
| Neutral oil (rice bran or canola) | 1 tsp per layer | High smoke point; olive oil overpowers the delicate flavor |
| Nonstick pan (8–9 inch / 20–23 cm) | 1 | A smaller pan means fewer folds and easier shaping |
| Fine-mesh strainer | 1 | Straining the egg removes chalazae and creates a smoother sheet |
The pan size is critical. Too wide, and your egg layer spreads thin and tears when you lift it. Too small, and the egg won't spread at all. I measured my 8-inch pan once; it makes a roll that's about 2.5 inches wide after rolling—perfect for slicing into bite-size pieces.
Step-by-Step Tamagoyaki Recipe
Step 1: Prep the Egg Mixture
Crack the eggs into a bowl. Add the dashi, mirin, and soy sauce. Whisk with chopsticks in a sideways zigzag motion—not a circular whisk. You want to break the yolks and combine everything without whipping in air bubbles. (Bubbles create holes in the layers.)
Pass the mixture through a fine-mesh strainer into another bowl. This catches the thick white strands that otherwise create lumps.
Step 2: Heat and Oil the Pan
Set your pan over medium-low heat for two minutes. Add 1 teaspoon of oil and wipe it around with a folded paper towel held by tongs. The paper towel should glide, not sizzle. If it sizzles loudly, your pan is too hot—lower the heat and wait 30 seconds.
Step 3: Cook and Roll
Pour in about 1/3 of the egg mixture—enough to coat the bottom of the pan but not deep. Tilt the pan to spread it evenly. Let it cook undisturbed for about 45 seconds to a minute. The surface should still look slightly wet but the bottom should be set.
Starting from the far side, fold the egg toward you in three quick folds. Don't overthink it—if a little egg spills out, that's normal. Slide the roll to the far side of the pan.
My secret move: After each fold, push the roll back to the far side and oil the exposed pan surface with the paper towel again. This prevents sticking and builds up those clean layers.
Step 4: Repeat for Three Layers
Pour the next third of egg into the empty side of the pan. Lift the existing roll slightly with chopsticks so the new egg flows underneath it. Cook for 40–50 seconds, then roll again. Repeat one more time with the remaining egg.
Step 5: Shape and Rest
While the roll is still hot, transfer it to a bamboo mat (or parchment paper) and roll it up tightly. Let it sit for two minutes. This sets the shape and makes slicing cleaner. I've cut into a hot roll before—it always crumbled. Patience pays.
Slice into 1-inch pieces with a sharp, damp knife.
Common Mistakes and Fixes
Over the years, I've made every mistake in the book. Here are the three that trip up most home cooks—and how to correct them.
- "My layers tear when I roll." The egg is too thick or the pan is too hot. Add a splash more dashi to thin the mixture slightly and lower the heat. Also, don't cook the layer until it's completely dry—a slightly wet surface helps the folds adhere.
- "The roll is pale and boring." You're probably using too much soy sauce or not enough oil. Pale tamagoyaki is actually desirable in Japanese cuisine—it's meant to be light. If you want color, add a pinch of sugar and let the first layer brown for five extra seconds before rolling.
- "My roll falls apart when I slice it." Two causes: not draining excess liquid from the egg mixture (strainer solves this) or slicing too soon. Let the roll rest—it firms up as it cools.
One more thing: don't rinse your pan between layers. The residual oil and heat are your friends.
Troubleshooting Your Tamagoyaki
This tamagoyaki recipe has become my go-to for everything from breakfast to bento. It's not the fanciest version you'll find online, but it's the one that gets the layers right without a single curse word. That's good enough for me.
Reader Comments